How To Install Mods in FF8 Remastered with Eden Launcher

In this tutorial you will learn what the features of Eden Launcher are and how to use them – this is an executable program designed to facilitate the management of mods for Final Fantasy VIII Remastered on Steam.
The idea for the Eden Launcher was born during the development of another mod I created for the game, the “4k Video Pack”. This idea arose from my need for a graphical interface for managing mods that would make it easier to test the compatibility of the 4K mod with other existing FFVIII Remastered mods.
I wanted a mod manager similar to those already existing in other titles in the series, something like: 7th Heaven (FFVII), Junction 8 (FFVIII-2013) and Memoria Engine (FFIX). Among other functions, these would allow you to install, remove, and set the installation order of mods without having to restore the game and copy and paste dozens of folders and files for each new combination.
However, since I currently work alone and have neither the time nor the necessary knowledge to debug the entire game and create a new engine on top of it, my goal was not to develop a solution from scratch, but rather to create a graphical interface for the existing solutions that I knew and used for FFVIII Remastered.
Therefore, I want to express my sincere gratitude to Marcin Gomulak ( MaKiPL ) for “FF8_demaster,” which loads the mods and makes the magic happen during the game, and also to Jérôme Arzel ( myst6re ) for “qt-zzz,” which makes this launcher work with “zzz” files effortlessly; without these tools, the Eden Launcher wouldn’t exist.
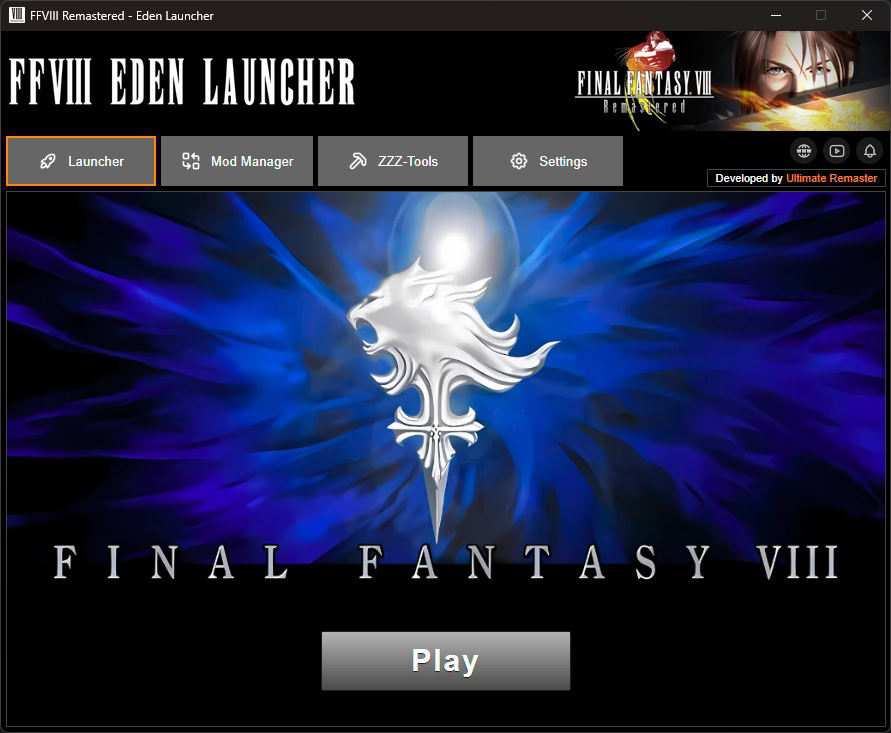
I – Launcher Tab
The “Launcher” tab is the program’s first tab and also its home screen. Basically, it contains the navigation menu between the four tabs: “Launcher”, “Mod Manager”, “ZZZ-Tool”, and “Settings”, as well as the “Play” button to start the game. If no mods are installed, the game will run normally in its default settings.
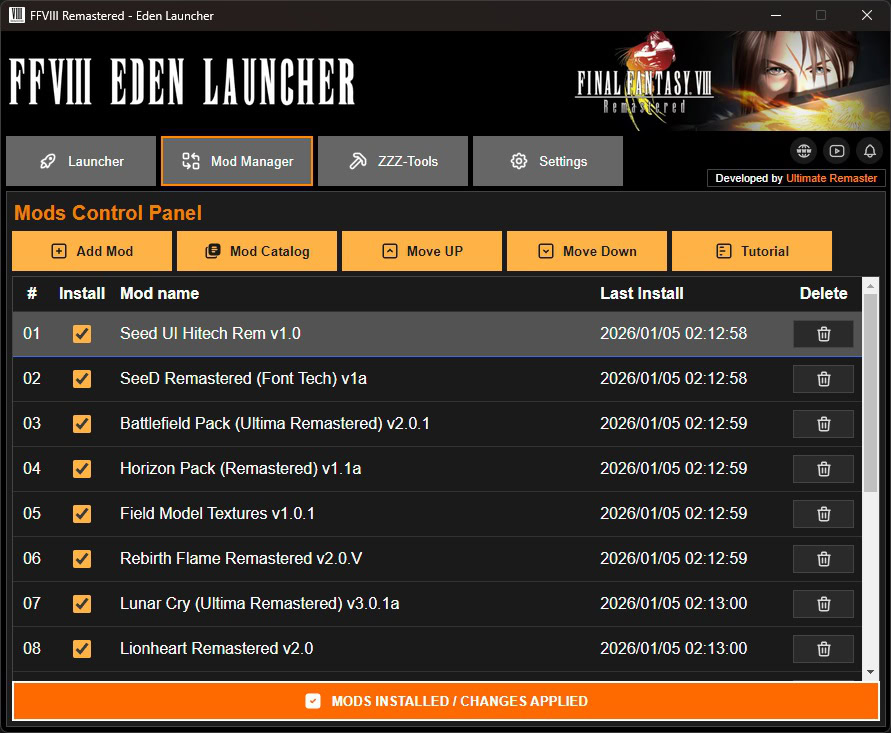
II – Mod Manager Tab
In this tab you can add, organize, and select the mods you want to install for the game. Here you will also find the mod catalog, which is a selection of essential mods to help you have the best possible experience with FFVIII Remastered. Obviously, the catalog doesn’t contain all the mods available for the game, but it does include those that are essential for a better experience.
When you run the Eden launcher for the first time, your mod list will be empty; in fact, there will only be the Blue Title Screen mod, which comes as a demo and changes the game’s title menu to a blue background screen, similar to the Eden launcher’s background in the launcher tab.
Mod Manager Features
Learn more about the mod manager’s features and functions by clicking on the tags below.
Using this button (highlighted in orange), you can add/import the folders of the mods you downloaded to the “Mod Manager” list.

Warning: the launcher does not add zipped files, so unzip your mod before trying to add it.
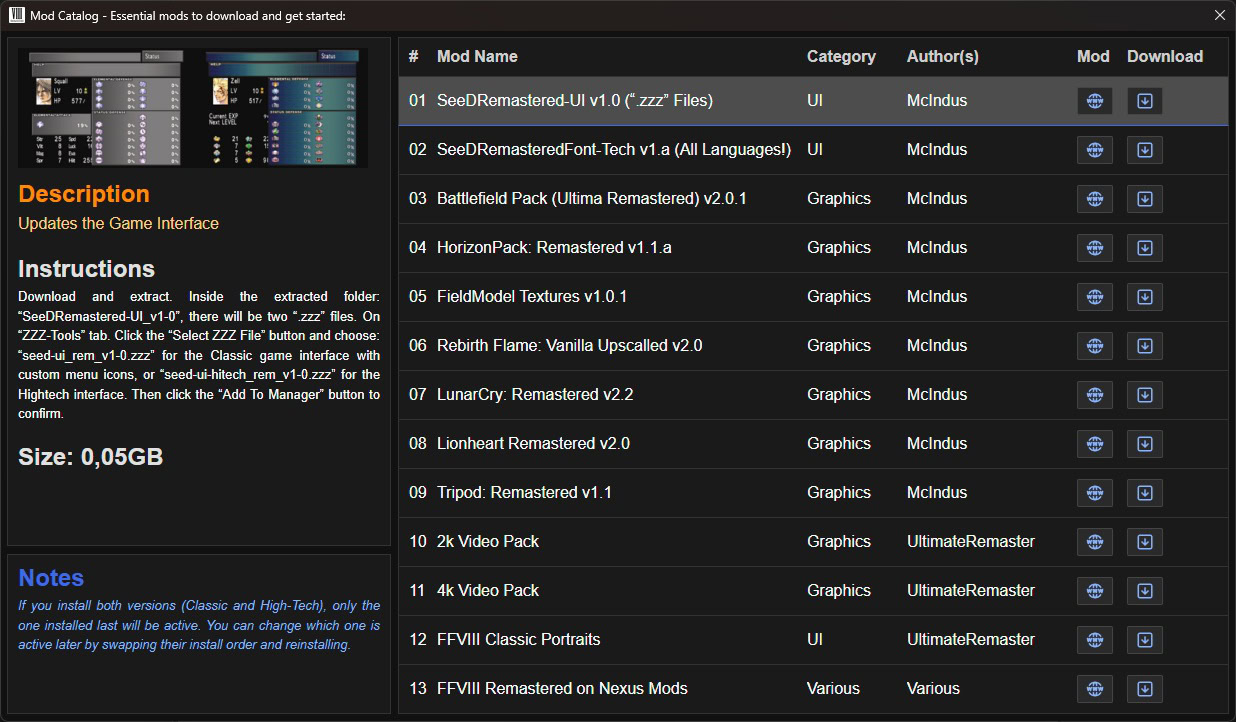
This button opens the mod catalog window. The catalog’s purpose is to serve as a starting point, especially for those who are just beginning to explore the world of Final Fantasy VIII Remastered mods and don’t know where to begin or where to download the essential mods to enhance their gaming experience.

Tip 1: Eden Launcher is not limited to its catalog and accepts any mod developed for the game, through the “Add Mod” option, following the instructions in the section above. If your mod is in .zzz format, see the instructions in the “ZZZ-Tool” tab.
Tip 2: If you are using SeeDRemastered-UI mods along with translation mods for your language and are experiencing font overlap issues, position your translation mod before the SeeDRemastered mods you have downloaded and activated.
Tip 3: If you don’t know which installation order to set, follow the order shown in the mod catalog. Then download the mods you want to try and place them at the end of the list. If the mod you downloaded overwrites any mod in the catalog, then you will have to place the downloaded mod before the overwritten mod(s).
In any game and in any mod manager, the priority of mod installation is crucial. It can determine whether your mod setup will work as it should or not. Some mods are not compatible with each other and may naturally overwrite each other’s files. In case of overlap, the files of the last mod installed will always prevail over previous ones with shared files.
Therefore, the installation order should be carefully considered, especially regarding mods that naturally have this tendency, such as two mods that change the clothes of the same character, or two mods that change the menu interface. In this case, if both are activated, it is almost certain that there will be some level of overlap between the mods, and the last one will have all its files installed while the previous one will have a large part or even all of its files overlapped during installation.
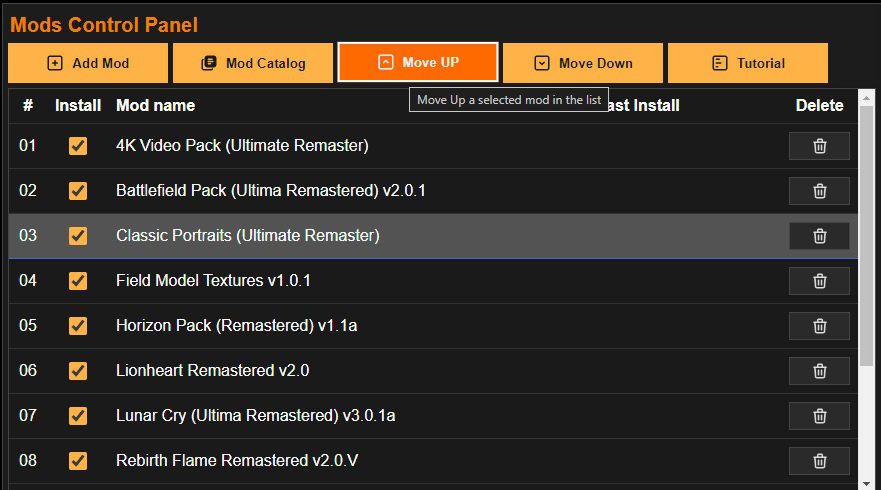
To set the installation order of mods in the Eden Launcher, use the “Move UP” and “Move Down” buttons to change the installation order of the mod list. Click on the row of the mod you want to move to select it; the row will be slightly highlighted among the others. Then click the “Move UP” and “Move Down” buttons to move the mod up or down in the list, respectively.
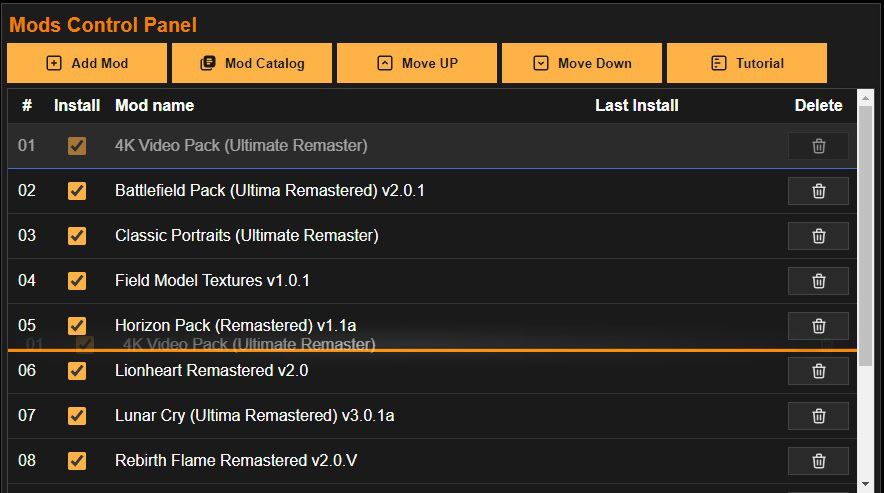
The “Mod Installation Order” list also has a “Drag and Drop” feature to make organizing your mods easier. To use this feature, left-click on the name of the desired mod and hold the button down while dragging the mod to the desired position. The new location will be marked between the current positions by an orange line, as shown in the image below. If the marked position is the desired one, release the left mouse button and the adjustment will be made automatically.
To set the installation order of mods in the Eden Launcher, use the “Move UP” and “Move Down” buttons to change the installation order of the mod list. Click on the row of the mod you want to move to select it; the row will be slightly highlighted among the others. Then click the “Move UP” and “Move Down” buttons to move the mod up or down in the list, respectively.
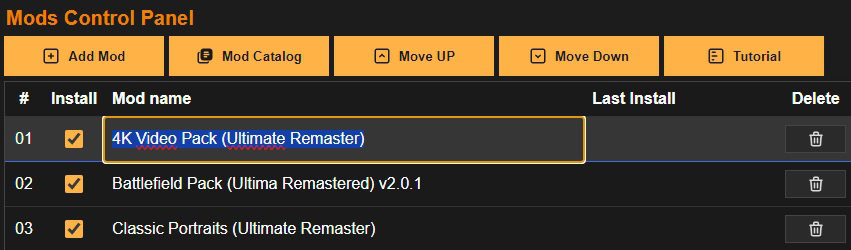
If you wish to standardize the naming of downloaded mods, you can rename your mods directly from the installation list, using the two methods described below.
METHOD 1: Double-click with the left mouse button on the name of the mod you want to rename. The Mod name field will be highlighted and the name of the selected mod will be displayed, allowing you to rename it.
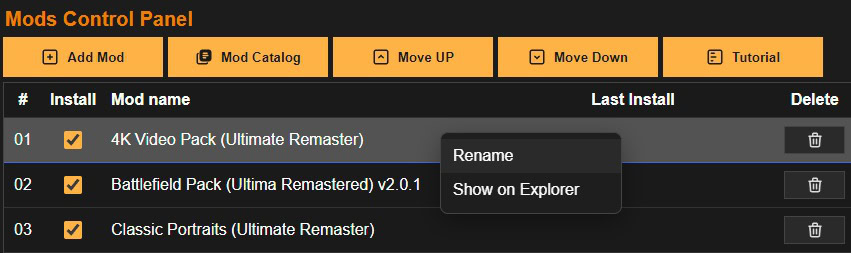
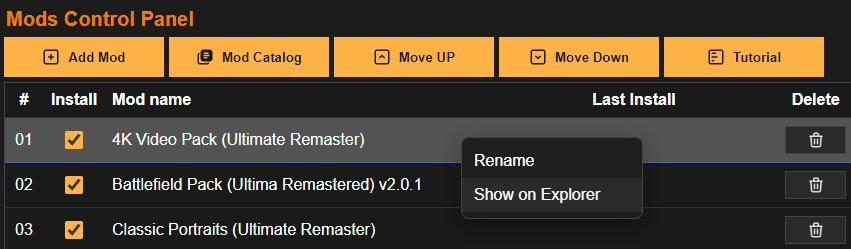
METHOD 2: Right-click on the game’s name. A submenu will appear with the option “Rename”. Select this option and the “Mod name” field will be enabled for editing.
If you’ve noticed that all the screenshots shown so far display my installation list with the mods named differently, now you know how to change that too.
Adding a mod to the installation list doesn’t necessarily mean you always have to install it. This means you can enable or disable the installation of a listed mod, making your management more dynamic. To use this function, simply check or uncheck the box next to the desired mod in the “Install” column, as shown in the image below.

Whenever a mod is added to the installation list, it is enabled by default.
After adding and ordering all the mods you want, click the “Install Mods” button to apply the mods to the game in the order you specified.

During the mod installation, the following operations will be performed:
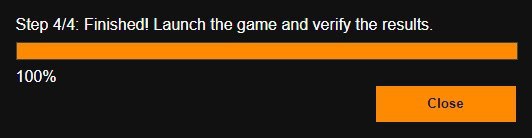
Of all the steps, step 3 takes the longest. After completing all steps, a confirmation message will be displayed, and you can start the game by clicking the “PLAY” button in the “Launcher” tab.

After the installation is complete, the text on the installation button changes, confirming the installation, and the button is disabled until some change is made to your installation setup.
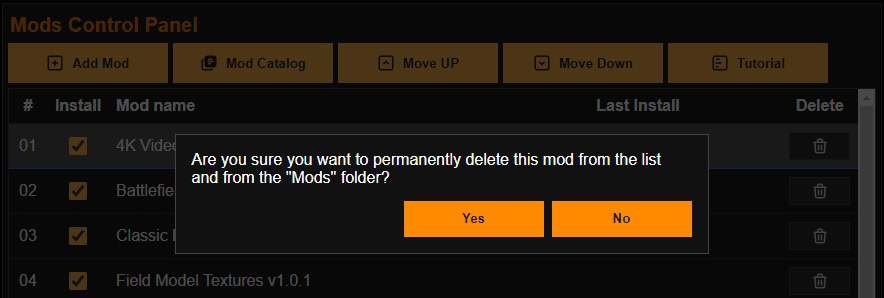
To delete a mod from the Installation list, simply click the trash can icon at the end of each line, and a confirmation message will appear to confirm the deletion of the mod from the line where the trash can was clicked.
To set the installation order of mods in the Eden Launcher, use the “Move UP” and “Move Down” buttons to change the installation order of the mod list. Click on the row of the mod you want to move to select it; the row will be slightly highlighted among the others. Then click the “Move UP” and “Move Down” buttons to move the mod up or down in the list, respectively.
After adding any of your mods to the installation list, you can explore its files and folders if you wish. To do this, simply right-click on the name of the mod you want to explore. A submenu window will appear; in this window, select the “Show on Explorer” option, and the Eden Launcher will open the folder of the selected mod.
If you make any modifications to the mod files and directories, you will need to perform a new installation to apply them to the game. Remember that adding, editing, or deleting mod files may result in bugs or even crash the game if you don’t know what you’re doing.
III – ZZZ-Tools Tab
Some Final Fantasy VIII Remastered mods are available in .zzz format, such as SeeDRemastered-UI, which alters the game’s menu interface. In the “ZZZ-Tool” tab, you can package and unpack these files, or, more conveniently, add them directly to the Mod Manager.
This guide is divided into two functions: “Make ZZZ” and “Extract ZZZ” – “packaging” and “unpacking” respectively. I’ll start with the first one, which I believe will be used more by other modders than by players themselves.
ZZZ-Tools Features
Learn more about the ZZZ-Tools features and functions by clicking on the tags below.
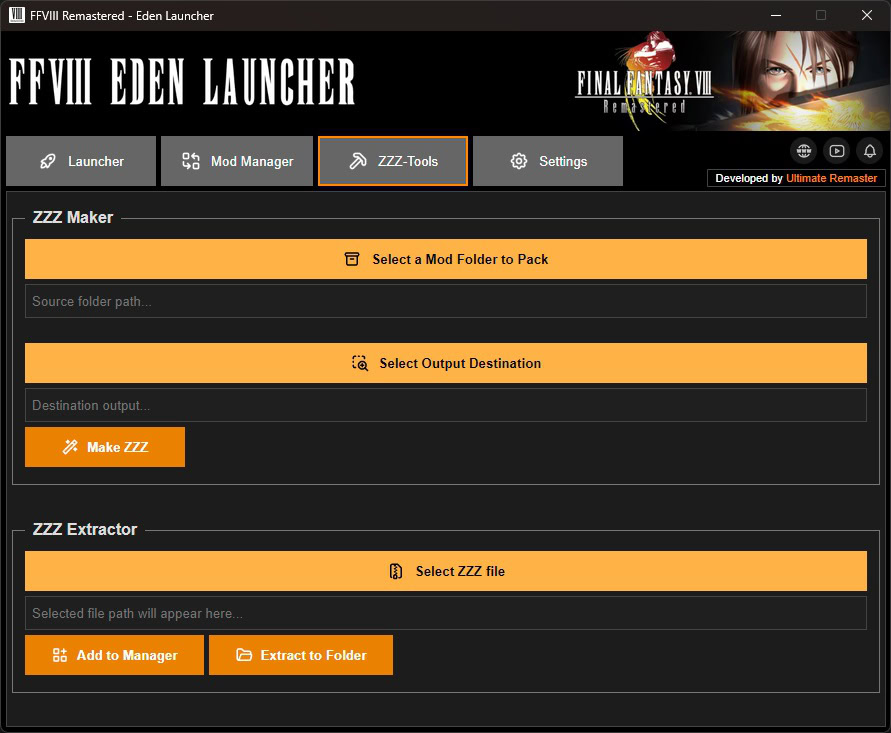
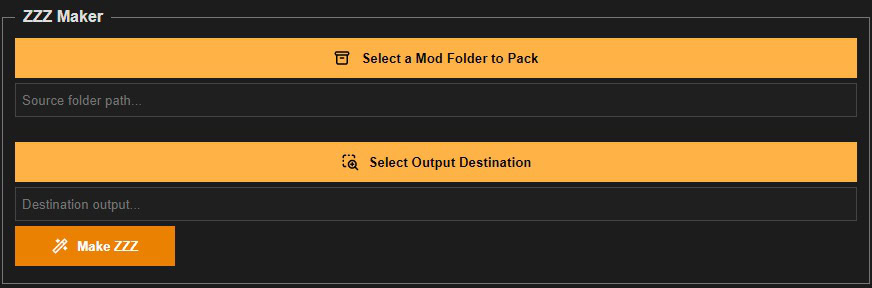
To create a new .zzz file, in the “ZZZ Maker” section, click the “Select a Folder to Pack” button and select the folder you want to pack. Then click the “Select Destination Folder” button and select the folder where the Eden Launcher should save the final file. Next, click the “Create ZZZ” button to start the process.
To extract a .zzz file from the “Extract ZZZ” section, click the “Select ZZZ File” button and select the desired .zzz file. You will then have two options:
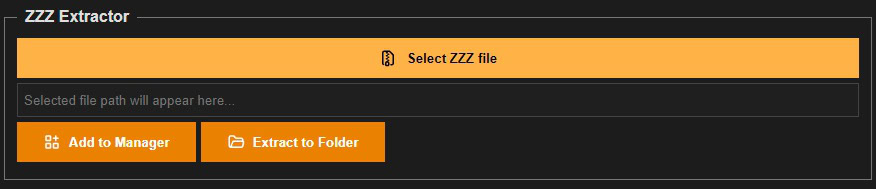
Warning: the launcher does not add zipped files, so unzip your mod before trying to add it and always add the mod’s root folder, not just its files and subfolders.
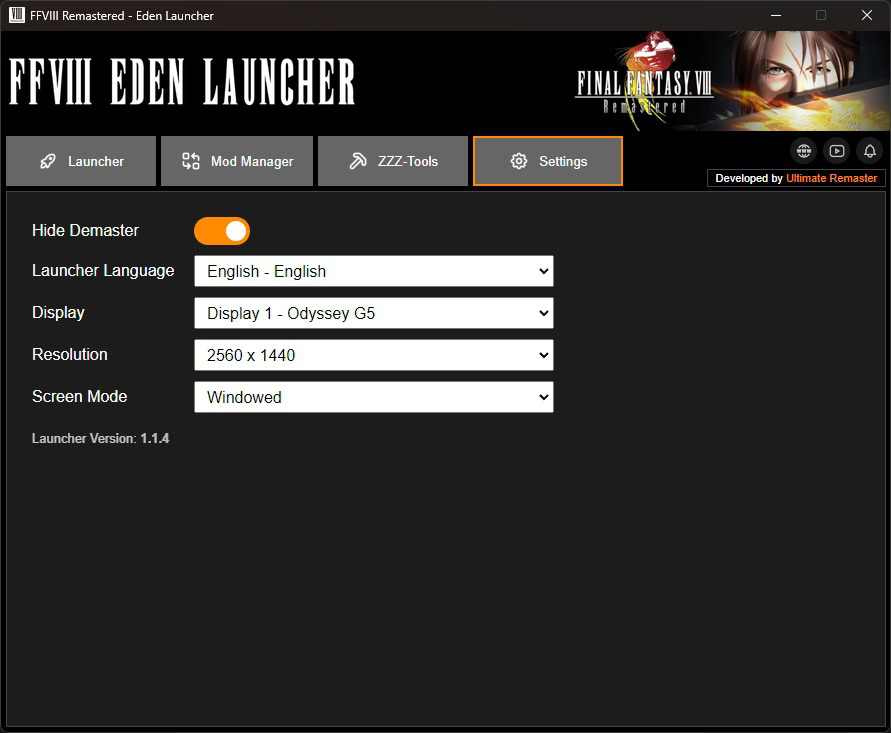
IV – Settings Tab
In this final tab you will find some basic settings related to the game:
Settings Options
Learn more about the settings options by clicking on the tags below.
This option allows you to hide or show the FF8_Demaster window. If you don’t already know, this is the program that actually executes the changes to the game during real-time execution, according to the mods installed in its root folder, DEMASTER_EXP, which is located in the game’s main directory and was also mentioned earlier in this tutorial.
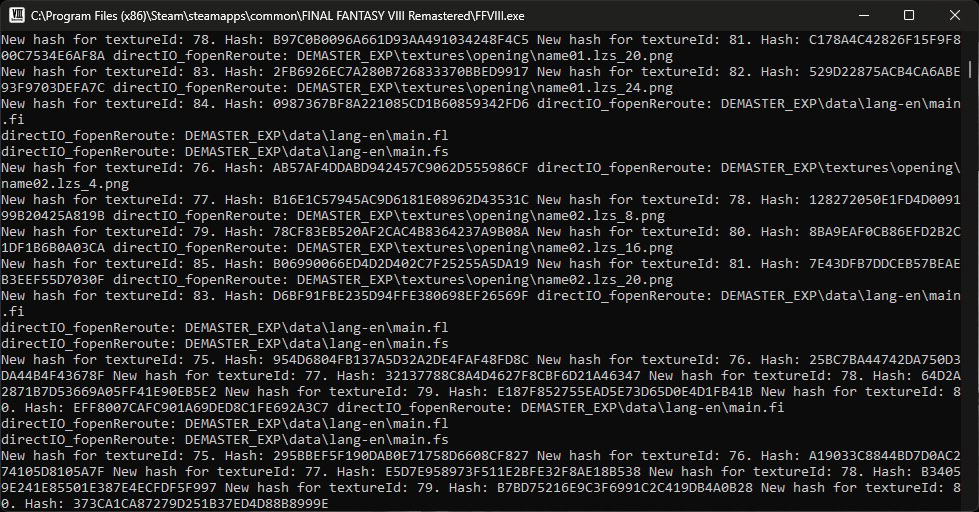
The “Hide Demaster” option is enabled by default, but if you want to display the program window, simply disable this option.
If you have more than one display screen, this option will allow you to easily select which screen you want the game to open on.
Once the display is selected, Eden Launcher will list the resolution options for the selected screen.
In this option you select whether you want the game to open in Full Screen, Windowed Mode, or Borderless Windowed Mode.